PostgreSQL Quick Administration Reference
Install PostgreSQL on Debian using APT:
# aptitude install postgresql postgresql-client
[ after install service is already started and scheduled for automatic start on reboot]
Install PostgreSQL on CentOS using YUM:
# yum install postgresql-server postgresql
On CentOS you need to initialize the db cluster prior to launch the service:
# /etc/init.d/postgresql initdb
Launch the service:
# /etc/init.d/postgresql start
Configure for automatic launch at system boot:
# chkconfig postgresql on
Once the service is installed, we may switch user to PostgreSQL administrative user:
# su - postgres
As postgres user, create a new database user (“role”):
$ createuser -PE dbuser[ the -PE flags indicate that we also want to create a (P)assword that will be stored as (E)ncrypted MD5 ]
You will be asked whether the new user ‘dbuser’ should have superuser privileges:
Shall the new role be a superuser? (y/n)
If you answer no, you will also be prompted for:
Shall the new role be allowed to create databases? (y/n)
Shall the new role be allowed to create more new roles? (y/n)
Always as postgres user, create also a new PostgreSQL database ‘mydb’ (O)wned by user ‘dbuser’:
$ createdb -O dbuser mydb
Connect to the newly created database as dbuser using psql, the command-line interface to PostgreSQL:
$ psql -d mydb -U dbuser
Here’s the prompt you should be presented to:
mydb=>
*** TIP ***
If you are prompted with the following error:
psql: FATAL: Ident authentication failed for user “dbuser"
Open /var/lib/pgsql/data/pg_hba.conf as root and change this line from:
local all all ident
To:
local all all trust
And then reload PostgreSQL service:
# /etc/init.d/postgresql reload
(on Debian you have to change /etc/postgresql/VERSION/main/pg_hba.conf)
Once connected to your database, let’s try out some SQL lines…
Create a table:
mydb=> CREATE TABLE phonebook(name TEXT, phone INT);
Populate the table:
mydb=> INSERT INTO phonebook(name, phone) VALUES(‘Marco’, 123456);
Turn on expanded display:
\x on Expanded display is on.
Display table content:
dd
mydb=> SELECT * FROM phonebook;
name | phone
-------+--------
Marco | 123456
(1 row)
Exit from psql CLI:
mydb= \q
You may perform all PostgreSQL related administrative tasks launching psql from shell as postgres user:
$ psql
Your prompt should change as follows:
postgres=#
Show user (and privileges) list:
postgres-# \du
List of roles
Role name|Attributes|Member of
---------+----------+---------
dbuser   |          |{}
postgres |Superuser |{}
        : Create role
        : Create DB
Show database list:
postgres-# \l
                                  List of databases

 Name  | Owner | Encoding| Collation |  Ctype | Access privileges
-------+——-+———+———–+——–+——————–+
mydb   | dbuser |UTF8   |en_US.UTF-8|en_US.UTF-8|
postgres|postgres|UTF8  |en_US.UTF-8|en_US.UTF-8|
 (...)
Connect to a certain db:
mydb=> \c mydb2
Show tables (of connected db):
mydb2=> \dt
Show SQL command list:
mydb=> \h
Show help for a specific SQL command (ie. ALTER TABLE):
mydb=> \h ALTER TABLE
Command: ALTER TABLE
Description: change the definition of a table
Syntax
ALTER TABLE [ ONLY ] name [ * ]
action (...)
Exit from psql CLI:
mydb=> \q
Obviously you may also create/modify user and databases from inside psql command-line tool:
Create a new database user and password:
postgres=# CREATE USER dbuser WITH PASSWORD ‘DESIRED_DB_PASSWORD_HERE’;
Create a new database for dbuser:
postgres=# CREATE DATABASE dbtest OWNER dbuser;
Change password for user dbuser:
postgres=# ALTER USER dbuser WITH PASSWORD ‘NEW_DB_PASSWORD_HERE’;
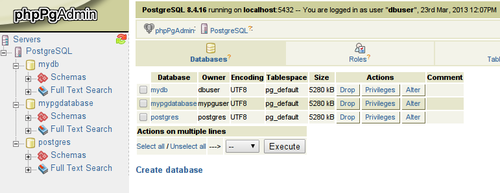
*** Extra *** Web based PostgreSQL administration (phpPgAdmin)
Install phpPgAdmin on Debian using APT:
# aptitude install phppgadmin
To install phpPgAdmin on CentOS using YUM you need EPEL repositories (see http://fedoraproject.org/wiki/EPEL). Then you can just launch install as follows:
# yum install phpPgAdmin
For minimal configuration, we will just modify phpPgAmin apache config file to also accept connections from our network (ie. 10.10.1.0/24):
# vi /etc/phppgadmin/apache.conf
allow from 127.0.0.0/255.0.0.0 ::1/128 10.10.1.0/255.255.255.0
Copy the edited configuration file to /etc/apache2/sites-enabled/
# cp /etc/phppgadmin/apache.conf /etc/apache2/sites-enabled/phppgadmin.conf
[ NOTE: On CentOS you will find the configuration file already at this path: /etc/httpd/conf.d/phpPgAdmin.conf ]
Reload apache daemon on Debian:
# /etc/init.d/apache2 reload
On CentOS:
# /etc/init.d/httpd reload
Open your web browser at http://${YOUR_DBSERVER_IP}/phppgadmin
On CentOS the url will be: http://${YOUR_DBSERVER_IP}/phpPgAdmin
Enjoy!