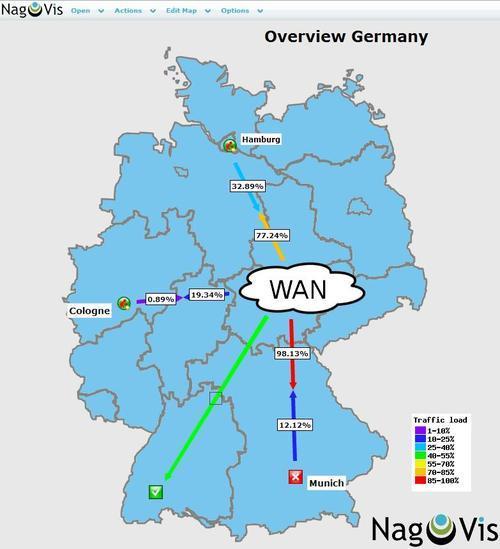
Visualize your Nagios/Icinga monitored IT infrastructure with NagVis
NagVis (http://www.nagvis.org/) is a visualization addon for Nagios/Icinga that permits to visualize the monitored information as objects placed on maps. I decided to use mk-livestatus (see: http://mathias-kettner.com) as backend because it is reported to offer better performances than ndo.
The following procedure was tested on Debian Wheezy 7.0 x86_64 with a working Nagios3 standard configuration. First of all, let’s install the prerequisites:
apt-get install g++ make libc6-dev php-net-socket php5-sqlite sqlite3 graphviz
Now get and install mk-livestatus:
wget http://mathias-kettner.com/download/mk-livestatus-1.2.3i1.tar.gz
tar zxvf mk-livestatus-1.2.3i1.tar.gz
cd mk-livestatus-1.2.3i1
./configure && make
make install
Prepare the path for the mk-livestatus unix socket:
mkdir -p /var/lib/nagios/rw/
chown -R nagios:nagios  /var/lib/nagios/rw
Enable mk-livestatus by appending the following to the end of /etc/nagios3/nagios.cfg:
#### mk-livestatus config
broker_module=/usr/local/lib/mk-livestatus/livestatus.o /var/lib/nagios/rw/live
event_broker_options=-1
Get and install NagVis:
wget http://downloads.sourceforge.net/project/nagvis/NagVis%201.7/nagvis-1.7.9.tar.gz

tar zxvf nagvis-1.7.9.tar.gz -C /opt
cd /opt/nagvis-1.7.9/
chmod +x install.sh
./install.sh
Note: If you are using Icinga instead of Nagios3, you should launch the installer as follows:
./install.sh -s icinga
Here are the relevant options I had to set (I found this not so clear in the official NagVis documentation):
    nagios path: /etc/nagios3
    path to NagVis base: /etc/nagios3/nagvis
    Do you want to use backend mklivestatus? [y]: y
    MKLivestatus socket: unix:/var/lib/nagios3/rw/live
Installation output: (I suggest you to copy and paste it somewhere for later reference)
+------------------------------------------------------------------------------+
| Installation complete                                                        |
|                                                                              |
| You can safely remove this source directory.                                 |
|                                                                              |
| For later update/upgrade you may use this command to have a faster update:   |
| ./install.sh -n /etc/nagios3 -p /etc/nagios3/nagvis -l "/var/lib/nagios3/rw/live" -b mklivestatus -u www-data -g www-data -w /etc/apache2/conf.d -a y
|                                                                              |
| What to do next?                                                             |
| - Read the documentation                                                     |
| - Maybe you want to edit the main configuration file?                        |
|   Its location is: /etc/nagios3/nagvis/etc/nagvis.ini.php                    |
| - Configure NagVis via browser                                               |
|   <http://localhost/nagvis/config.php>                                       |
| - Initial admin credentials:                                                 |
|     Username: admin                                                          |
|     Password: admin                                                          |
+------------------------------------------------------------------------------+
Check /etc/nagios3/nagvis/etc/nagvis.ini.php, in particular the following section:
[backend_live_1]
backendtype="mklivestatus"
socket="unix:/var/lib/nagios3/rw/live"
Now let’s Navigate to NagVis url:
http://${IPADDRESS_OF_YOUR_NAGIOS_SERVER}/nagvis
Login with the default admin/admin credentials - Don’t forget to change them as soon as you access! If you have an error like this:
Problem (Backend: live_1): Unable to connect to livestatus socket. The socket /var/lib/nagios3/rw/live in backend live_1 does not exist. Maybe Nagios is not running or restarting.
You probably don’t have right permissions on /var/lib/nagios3/rw/live. Try to:
chown nagios:www-data /var/lib/nagios3/rw
(if you’re not using Debian, change ownership to nagios:${THE_USER_GROUP_THAT_OWNS_APACHE}) and then
chmod g+s /var/lib/nagios3/rw/
(so that group ownership of the live socket would stick to the apache usergroup)
Example IT map:
